The Ultimate Guide to Acrylic Nail Extensions: Tools and Techniques
Animesh Mishra
4/4/20258 min read

Introduction to Acrylic Nail Extensions
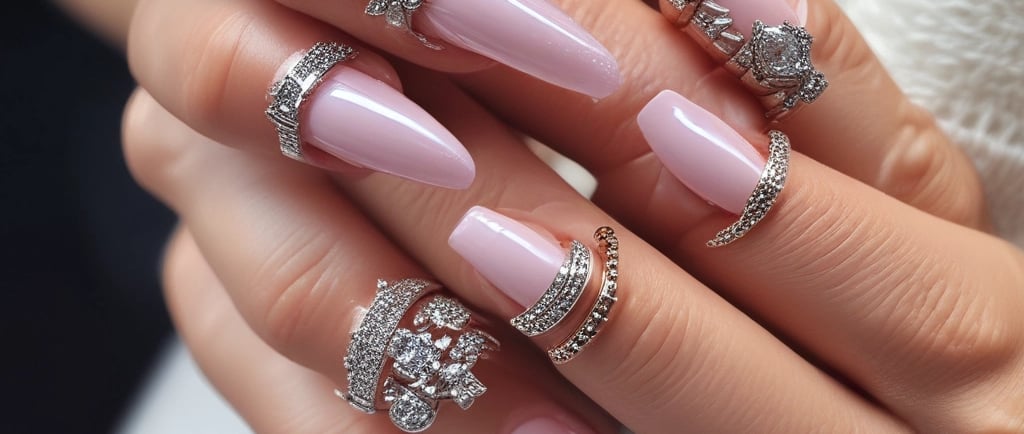
Acrylic nail extensions have gained immense popularity in the beauty industry, offering a perfect solution for those seeking beautiful and long-lasting manicures. Essentially, these extensions are artificial nails made from a blend of liquid monomer and powder polymer, which, when mixed, create a durable and moldable substance. Technicians can sculpt this material onto the natural nail or over a form to achieve the desired length and shape. This versatility not only caters to various aesthetics but also allows for significant creative expression through nail art and designs.
The durability of acrylic nail extensions is one of their most appealing features. Unlike traditional nail polish or enhancements, acrylics can withstand daily wear and tear, making them an excellent choice for individuals who may have active lifestyles. The strength provided by the acrylic material ensures that the nails remain intact without chipping or breaking easily. This extended longevity is often accompanied by the advantage of being less prone to damage compared to natural nails.
Moreover, acrylic extensions can be customized to suit personal style preferences. From classic French tips to intricate designs, the options are nearly limitless. Nail technicians can play with colors, shapes, and embellishments, broadening the creative horizons for clients. The appeal of acrylic nails lies not only in their functional attributes but also in their aesthetic versatility, attracting a diverse clientele from various backgrounds and fashion senses.
Utilizing the appropriate tools and techniques is crucial in the application process of acrylics. The right brushes, files, and implements, combined with proper techniques, can significantly influence the outcome of the nail enhancements, ensuring a polished and professional finish. In summary, acrylic nail extensions stand out in the realm of nail enhancements due to their durability, adaptability, and potential for creativity, making them a staple in modern beauty practices.
Essential Tools for Acrylic Nail Extensions
Creating beautiful and long-lasting acrylic nail extensions requires precision and the right set of tools. Each tool plays a critical role in the process, ensuring that the final result is both aesthetically pleasing and durable. Below is a comprehensive list of the essential tools and materials required for acrylic nail extensions, along with a brief description of their purpose.
Firstly, acrylic liquid and acrylic powder are fundamental components of the acrylic nail system. The acrylic liquid, often referred to as monomer, is combined with the acrylic powder to create a malleable substance that can be shaped into the desired nail form. This blend hardens into a durable structure after being applied correctly.
Nail forms or tips are also crucial in acrylic nail extensions. These products provide a base or guide to shape the acrylic material, allowing for a variety of lengths and styles. Nail forms are reusable and adaptable, while tips often come in different sizes to cater to individual nail shapes.
An acrylic brush is essential for applying and sculpting the acrylic mixture. The right brush helps ensure that the mixture is applied evenly and allows for detail work when shaping the nails. Selecting a high-quality brush specifically designed for acrylic applications is vital for mastering this technique.
A nail file and buffer are important tools for finishing the acrylic nails. The nail file is used to shape and smooth the edges and surface of the nails, while a buffer adds shine and smoothness. Properly filing and buffing can elevate the overall appearance of the acrylic extensions.
Finally, a top coat serves as a protective layer that enhances the shine and longevity of the finished nails. It seals the acrylic and prevents lifting or chipping of the nail extensions, thereby ensuring that the manicure lasts longer.
Preparing the Natural Nail
Before applying acrylic nail extensions, proper preparation of the natural nail is crucial to ensure a durable and aesthetically pleasing result. The first step in this process is to cleanse the nails thoroughly. This means removing any existing nail polish or debris, as cleanliness plays a significant role in preventing potential infections and enhancing the adhesion of the acrylic. Using a gentle nail polish remover, follow this up with washing hands or soaking the nails in warm, soapy water to eliminate any residual oils.
Next, focus on the cuticles. Pushing back the cuticles is an essential practice that not only enhances the appearance of the nails but also creates a cleaner canvas for the acrylic application. Utilize a cuticle pusher, which can be either plastic or metal, to gently push back the cuticles without causing damage to the surrounding skin. This process helps prevent lifting of the acrylic extensions, ensuring a longer-lasting manicure. If necessary, the use of a cuticle remover can further assist in softening and preparing the cuticles for this task.
After cuticle care, the nail surface requires a light buff. Gently buffing the natural nail promotes better adhesion of the acrylic by providing a slightly rough texture for the acrylic product to grip onto. It is important to use a fine-grit buffer to avoid causing damage or excessive thinning of the natural nails. Additionally, taking care to remove all dust generated during this step is imperative; failure to do so may compromise the bonding capability of the acrylic extensions.
Lastly, adhere to strict sanitation practices throughout the preparation process. Using disinfected tools and maintaining a clean workspace not only protects the client but also promotes an optimal environment for the acrylic application. Proper preparation of the natural nail lays the foundation for successful acrylic extensions, ensuring beauty and durability in the final result.
Applying the Acrylic Nail Extension
The process of applying acrylic nail extensions is a meticulous one that requires precision and knowledge of various techniques. It begins with the preparation of the natural nails, which includes cleaning and shaping them. Ensuring the nails are free of oils and debris will promote better adhesion for the acrylic material.
Once the nails are prepped, the next step involves mixing the acrylic powder and liquid, typically a monomer. The ideal ratio should yield a dough-like consistency that is neither too dry nor too wet. A common mixing ratio is approximately two to one, with two parts powder to one part liquid. It is critical to avoid over-mixing, which can result in a grainy texture that may compromise the strength of the nail extension.
After achieving the right mixture, it is time to apply the acrylic to the natural nail or nail form. Start by dipping a brush into the acrylic mixture and gently placing a bead of acrylic at the cuticle area of the nail. Using the brush, work the bead toward the tip of the nail, applying gentle pressure to push the material into place while maintaining the desired shape. The application should be smooth, with the intention of creating a natural curve that closely resembles the natural nail.
Shaping the acrylic extension is crucial to achieving a professional finish. After allowing the acrylic to harden, use an electric file or a hand file to refine its shape and smooth out any imperfections. Common shapes include oval, square, and almond, and achieving the right shape may require several passes with the file. Throughout the application process, it is essential to remain patient, as rushing can lead to mistakes such as uneven surfaces or excess bulk.
Lastly, common mistakes to avoid include applying too much product at once or failing to properly bond the acrylic to the natural nail. Mastering acrylic nail extensions takes practice, but with attention to detail and adherence to techniques, one can achieve beautiful and durable results.
Shaping and Finishing the Acrylic Nails
Shaping and finishing acrylic nails is crucial for achieving a polished and professional appearance. The first step involves using a suitable file to shape the nails according to the desired style. A medium grit file, typically ranging from 100 to 180 grit, is effective in removing bulk and refining the overall shape. It is essential to hold the file at an angle and use smooth, even strokes to avoid causing damage to the acrylic material. The most common shapes include square, round, and stiletto, each requiring different techniques to achieve the best results.
Once the initial shaping is complete, the finishing process begins. This is where the use of a finer grit file, around 240 grit, comes into play. It is instrumental in smoothing out any rough edges and ensuring that transitions between the nail and the acrylic are seamless. This step not only enhances the visual appeal but also prepares the nails for buffing, which is a critical phase in achieving a refined finish. Buffing should be done gently, as excessive pressure can lead to shine loss or damage the underlying acrylic.
After buffing, the application of a quality top coat becomes essential. A top coat not only provides additional shine but also serves as a protective barrier, extending the longevity of the acrylic nails. It is advisable to choose a top coat that is formulated specifically for acrylic nails, as this will ensure compatibility and optimal results. Proper application techniques should be applied, such as avoiding the cuticle area and ensuring even coverage across the entire nail surface. By carefully shaping and finishing acrylic nails, one can ensure both aesthetic appeal and durability, resulting in a beautiful manicure that lasts.
Aftercare for Acrylic Nail Extensions
Proper aftercare is essential for maintaining the longevity and appearance of acrylic nail extensions. By following specific maintenance tips, users can prevent damage and ensure their enhancements continue to look fresh and well-kept. One of the most significant aspects of acrylic nail aftercare is avoiding activities that may cause unnecessary stress on the nails. For example, using the nails as tools for opening cans or prying open objects can lead to breakage or lifting. Additionally, wear gloves while performing household chores, particularly when dealing with harsh cleaning products, to safeguard the acrylics.
Choosing the right products also plays a key role in the aftercare of acrylic nails. Opting for a gentle, non-acetone nail polish remover allows for safe removal of polish without compromising the integrity of the acrylics. Furthermore, applying cuticle oil regularly can help keep both the natural nail and the acrylic extensions moisturized. Regular hydration not only aids in maintaining the flexibility of the enhancements but also promotes healthy nail growth.
Another vital aspect of acrylic nail maintenance is scheduling regular fills with a professional nail technician. As the natural nail grows, a gap may appear between the acrylic and the cuticle, which can lead to lift or breakage if not addressed promptly. Generally, fills are recommended every two to three weeks, depending on individual growth rates and lifestyle factors. Early intervention allows for the upkeep of a flawless appearance and the overall health of the nails.
Lastly, it is crucial to recognize the signs that indicate a need for professional assistance. If there is noticeable lifting, or if the acrylic nails become discolored or erroneous, visiting a professional is advised. Ensuring that acrylic nails are well cared for not only enhances their aesthetic appeal but also contributes to the wellbeing of the natural nail beneath.
Common Mistakes and Troubleshooting
Acrylic nail extensions are a popular choice for enhancing nail aesthetics, but they can be prone to a variety of issues if not applied correctly. A common mistake is lifting, which occurs when the acrylic does not adhere properly to the natural nail. This can be attributed to inadequate preparation of the nail plate. To minimize this, ensure that the surface is thoroughly cleaned and de-oiled before application. Utilizing a good quality primer can significantly enhance adhesion, reducing the risk of lifting.
Another frequent problem is the formation of bubbles within the acrylic. Bubbles can arise from mixing the acrylic powder and liquid too vigorously or from applying the product too quickly. To avoid this, employ gentle mixing techniques and apply the acrylic slowly, allowing it to settle. If bubbles occur, they can often be lightly filed away after curing, although it’s essential to be cautious not to damage the underlying acrylic or natural nail.
Uneven application is another issue that can compromise the final look of acrylic nail extensions. This often stems from an improper technique while sculpting or applying the acrylic. A well-structured application method is crucial. Start at the cuticle area and use smooth, even strokes while working towards the tip, ensuring a consistent thickness throughout the nail. If you notice unevenness after the application, filing and shaping may rectify the problem, creating a more refined appearance.
Preventive measures are essential for a successful application. Ensure you have the right tools, taking care to use high-quality acrylic products and brushes suitable for your technique. Additionally, regular practice and seeking tutorials can enhance your skills, minimizing mistakes over time. By understanding and knowing how to troubleshoot common issues, acrylic nail extensions can be applied successfully, providing beautiful and long-lasting results.